In this tutorial we will be using the provided shape functions of SDL to start drawing to the screen. If you haven’t already, head on over to https://jsayers.dev/tutorials/ to get caught up on the setup tutorials. As always source code for this tutorial can be found at https://github.com/JeremySayers/SDL2-CS-Tutorial.
From our previous tutorial, Creating a Window, we created a Render() function that currently looks like:
/// <summary>
/// Renders to the window.
/// </summary>
void Render()
{
    // Sets the color that the screen will be cleared with.
    SDL.SDL_SetRenderDrawColor(renderer, 135, 206, 235, 255);

    // Clears the current render surface.
    SDL.SDL_RenderClear(renderer);

    /* This is where we will be drawing */

    // Switches out the currently presented render surface with the one we just did work on.
    SDL.SDL_RenderPresent(renderer);
}
The first call toSDL_SetRenderDrawColor() sets the color that SDL will use for rendering functions, and then we immediately clear the screen with that color using SDL_RenderClear(). After we clear the screen, but before we actually present the new buffer to the screen with SDL_RenderPreset() we want to draw our shapes. If we just start drawing though, we won’t be able to see anything since SDL will be using the same color, so first let’s change the color to red after we clear the screen.
// Set the color to red before drawing our shape
SDL.SDL_SetRenderDrawColor(renderer, 255, 0, 0, 255);
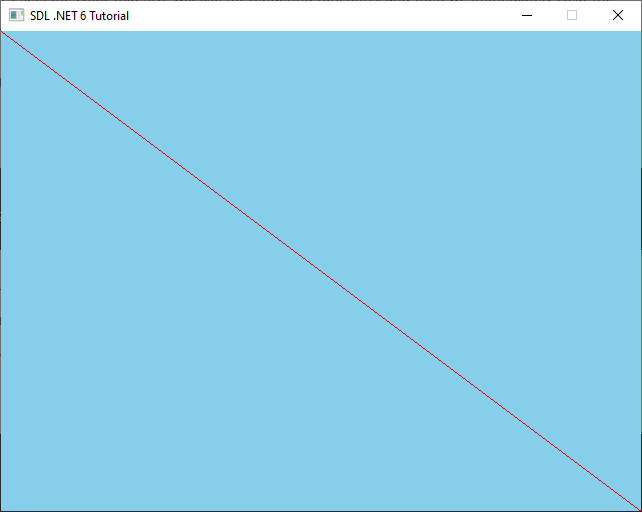
Now that we’ve got the color set to something we can see on the background, we can get our first shape drawn! We’ll be starting out with a line that just takes the start coordinates and end coordinates. To draw a line from the top left of our screen to the bottom left of our screen we make a call toSDL_RenderDrawLine() and our Render() function now looks like:
/// <summary>
/// Renders to the window.
/// </summary>
void Render()
{
    // Sets the color that the screen will be cleared with.
    SDL.SDL_SetRenderDrawColor(renderer, 135, 206, 235, 255);

    // Clears the current render surface.
    SDL.SDL_RenderClear(renderer);

    // Set the color to red before drawing our shape
    SDL.SDL_SetRenderDrawColor(renderer, 255, 0, 0, 255);

    // Draw a line from top left to bottom right
    SDL.SDL_RenderDrawLine(renderer, 0, 0, 640, 480);

    // Switches out the currently presented render surface with the one we just did work on.
    SDL.SDL_RenderPresent(renderer);
}
Red line drawn from top left to bottom right of our window.
SDL has two other built-in shapes for us to use, points and rectangles. Points are drawn with SDL_RenderDrawPoint() while rectangles can be drawn filled in with SDL_RenderFillRect() or just as an outline with SDL_RenderDrawRect(). Points are easy enough to draw only requiring 3 arguments, a pointer to our renderer, an x location and a y location like this:
// Draws a point at (20, 20) using the currently set color.
SDL.SDL_RenderDrawPoint(renderer, 20, 20);
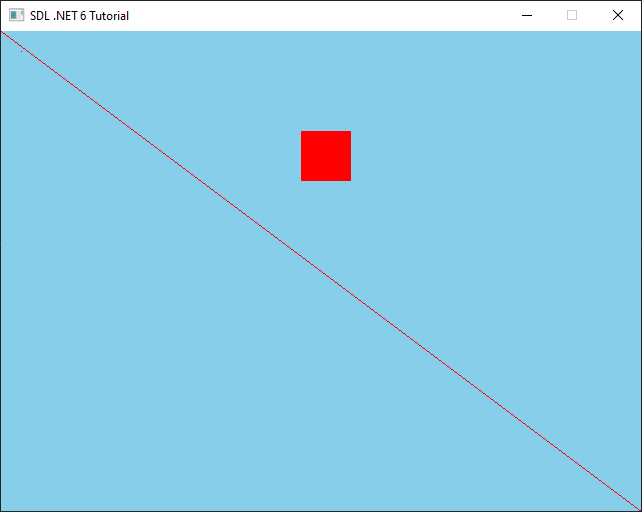
SDL_RenderFillRect() and SDL_RenderDrawRect() both require a pointer to our renderer as well as a reference to a SDL_Rect. An SDL_Rect is a simple struct the specifies the top left of the rectangle as (x,y) coordinates along with a width and height. Add the following to our Render() function, paying attention to the ref keyword needed when we pass our rect. and you’ll now have something the resembles the screenshot below!
// Specify the coordinates for our rectangle we will be drawing.
var rect = new SDL.SDL_Rect
{
    x = 300,
    y = 100,
    w = 50,
    h = 50
};

// Draw a filled in rectangle.
SDL.SDL_RenderFillRect(renderer, ref rect);
Rectangle, Line, and a Point drawn.
These three basic shapes can give you a lot to work with, especially with basic game prototyping. During game jams, I’ll find myself using mostly rectangles to get a minimum viable product running before I start spending time drawing textures. As another note, you may have noticed that there are a lot of other similar function names to the 4 we’ve seen today. SDL has a plural variant of each such as SDL_RenderDrawRects() or SDL_RenderDrawLines(), as well as variants using floats instead of ints like SDL_RenderDrawRectF() and SDL_RenderDrawLineF(). Finally there are combo ones that draw multiple of the given shape, as well as using floats like SDL_RenderDrawPointsF().
Exercises
The best way to learn usage of these functions, and remember them is to try some exercises on your own. Below are some great ones that should reinforce SDLs shape functions. Feel free to leave a comment with any questions if you get stuck!
Create a Rectangle class that can hold its SDL_Rectand can be rendered. Bonus points if you create a Shape base class to encapsulate the shared features of all the shapes.
In this tutorial we’ll be going over getting a window created with C#, .NET 6, and SDL. If you haven’t gotten your environment setup yet, you’ll want to head on over to the Part 1 Setup here. Although the setup tutorial ends with displaying a window to verify everything is working, we’ll be organizing the code a little bit more this time around and going over each block. All of this code belongs in our Program.cs which is utilizing .NET 6 top level statements to clear away some boilerplate. The entire source for the tutorial can be found at https://github.com/JeremySayers/SDL2-CS-Tutorial.
using SDL2;
using System;
The first couple of lines are just to setup our usings with using SDL2 being used for interacting with our SDL2-CS bindings, and using System being used for writing out possible errors to the console.
The next block of code sets up some global variables we’ll be using to interact with the window and renderer. Because SDL2 is c based, most of the objects that we’ll be initializing will be returned as a pointer, so in C# we’ll need to use the IntPtr struct for working with them.
Setup();

while (running)
{
    PollEvents();
    Render();
}

CleanUp();
The next block contains all of the functions we’ll be declaring and using throughout the rest of our Program.cs. Let’s go over them section by section.
Setup
/// <summary>
/// Setup all of the SDL resources we'll need to display a window.
/// </summary>
void Setup()
{
    // Initilizes SDL.
    if (SDL.SDL_Init(SDL.SDL_INIT_VIDEO) < 0)
    {
        Console.WriteLine($"There was an issue initializing SDL. {SDL.SDL_GetError()}");
    }

    // Create a new window given a title, size, and passes it a flag indicating it should be shown.
    window = SDL.SDL_CreateWindow(
        "SDL .NET 6 Tutorial",
        SDL.SDL_WINDOWPOS_UNDEFINED,
        SDL.SDL_WINDOWPOS_UNDEFINED,
        640,
        480,
        SDL.SDL_WindowFlags.SDL_WINDOW_SHOWN);

    if (window == IntPtr.Zero)
    {
        Console.WriteLine($"There was an issue creating the window. {SDL.SDL_GetError()}");
    }

    // Creates a new SDL hardware renderer using the default graphics device with VSYNC enabled.
    renderer = SDL.SDL_CreateRenderer(
        window,
        -1,
        SDL.SDL_RendererFlags.SDL_RENDERER_ACCELERATED |
        SDL.SDL_RendererFlags.SDL_RENDERER_PRESENTVSYNC);

    if (renderer == IntPtr.Zero)
    {
        Console.WriteLine($"There was an issue creating the renderer. {SDL.SDL_GetError()}");
    }
}
Our Setup function does most of the heavy lifting for getting SDL running. First up we have a call toSDL_Init() (Keep in mind that we need to prefix most of the calls to SDL with SDL since that’s the bindings static class name). This function sets up the passed in SDL sub system, in our case SDL_INIT_VIDEO, and gives us a return value of 0 on success or a negative number indicating there was an error. Most SDL functions and their documentation can be found on https://wiki.libsdl.org/ with the function in question being found here: https://wiki.libsdl.org/SDL_Init.
In the event that the call to SDL_Init() failed, we’ll want to print out what went wrong to the console using Console.WriteLine. SDL gives us a handy function SDL_GetError() that will contain the most recent reported error.
// Create a new window given a title, size, and passes it a flag indicating it should be shown.
window = SDL.SDL_CreateWindow(
    "SDL .NET 6 Tutorial",
    SDL.SDL_WINDOWPOS_UNDEFINED,
    SDL.SDL_WINDOWPOS_UNDEFINED,
    640,
    480,
    SDL.SDL_WindowFlags.SDL_WINDOW_SHOWN);

if (window == IntPtr.Zero)
{
    Console.WriteLine($"There was an issue creating the window. {SDL.SDL_GetError()}");
}
Next, we make a call to SDL_CreateWindow() which takes in the following arguments:
Title – A string containing the title for the window to be displayed.
X – The X position on the current display to place the window, SDL.SDL_WINDOWPOS_UNDEFINED can be used to center it.
Y – The Y position on the current display to place the window, SDL.SDL_WINDOWPOS_UNDEFINED can be used to center it.
Width – The width of the window in pixels.
Height – The height of the window in pixels.
Flags – Flags to set the window up with, some common ones are SDL_WINDOW_SHOWN and SDL_WINDOW_FULLSCREEN.
We then check to make sure we get back a valid pointer to the window object that SDL created for us. By default, an IntPtr is set to IntPtr.Zero so if we still have that value, something went wrong and we can output the error to the console.
// Creates a new SDL hardware renderer using the default graphics device with VSYNC enabled.
renderer = SDL.SDL_CreateRenderer(
    window,
    -1,
    SDL.SDL_RendererFlags.SDL_RENDERER_ACCELERATED |
    SDL.SDL_RendererFlags.SDL_RENDERER_PRESENTVSYNC);

if (renderer == IntPtr.Zero)
{
    Console.WriteLine($"There was an issue creating the renderer. {SDL.SDL_GetError()}");
}
Now we need to setup the actual renderer that will be responsible for drawing our shapes, images, and textures to the screen. SDL2 comes with a capable hardware renderer that will easily let us create 2D games without needing to dig into OpenGL. To get started we’re going to make a call to SDL_CreateRenderer() which takes in the following arguments:
Window- A pointer to the window the renderer will be displayed.
Index – The index of the rendering driver to initialize, or -1 to initialize the first one supporting the requested flags.
Flags- Flags used to initialize the renderer.
In our case we want the renderer to be hardware accelerated so we’re passing SDL_RENDERER_ACCELERATED. There is also a software renderer available if you don’t have a dedicated GPU or iGPU paired with your CPU via SDL_RENDERER_SOFTWARE. Then we’re or’ing (|) that flag with the SDL_RENDERER_PRESENTVSYNC flag, which tells the renderer to wait for the next vertical sync before displaying the buffer to the screen. This means that our Render function later on will only be called 60 times a second (or whatever the refresh rate of your monitor is.)
Just like the window pointer we got back from SDL, we’ll want to also make sure the renderer got created properly by making sure the pointer isn’t still set to IntPtr.Zero.
Polling Events
/// <summary>
/// Checks to see if there are any events to be processed.
/// </summary>
void PollEvents()
{
    // Check to see if there are any events and continue to do so until the queue is empty.
    while (SDL.SDL_PollEvent(out SDL.SDL_Event e) == 1)
    {
        switch (e.type)
        {
            case SDL.SDL_EventType.SDL_QUIT:
                running = false;
                break;
        }
    }
}
We’ll be going over events more in a later part to this tutorial series, but for now we need a way to actually exit our window. To do this, every frame we’ll be making a call to SDL_PollEvent in a while loop. Every time we do this, SDL will either give us back an event to be processed, or it will return 0 indicating that there are no new events since the last time we read them all. Next we can check the type of event in a switch statement, in our case we care about SDL_EventType.SDL_QUIT which is called when we either hit the Close button on our window’s title bar, or possibly through ALT-F4. When we get this event, we want to set our global running variable to false so our main loop will exit.
Rendering to the Window
/// <summary>
/// Renders to the window.
/// </summary>
void Render()
{
    // Sets the color that the screen will be cleared with.
    SDL.SDL_SetRenderDrawColor(renderer, 135, 206, 235, 255);

    // Clears the current render surface.
    SDL.SDL_RenderClear(renderer);

    // Switches out the currently presented render surface with the one we just did work on.
    SDL.SDL_RenderPresent(renderer);
}
The render function is where we’re going to be doing all of our drawing to the window. First we need to setup the draw color that SDL will use, this will be the color that any clearing of the screen or shapes we draw will use. We can set that color with SDL_SetRenderDrawColor() which takes the following arguments:
Renderer – A pointer to the renderer that you want to set the draw color on.
R – The red value used to draw on the rendering target.
G – The green value used to draw on the rendering target.
B – The blue value used to draw on the rendering target.
A – The alpha value used to draw.
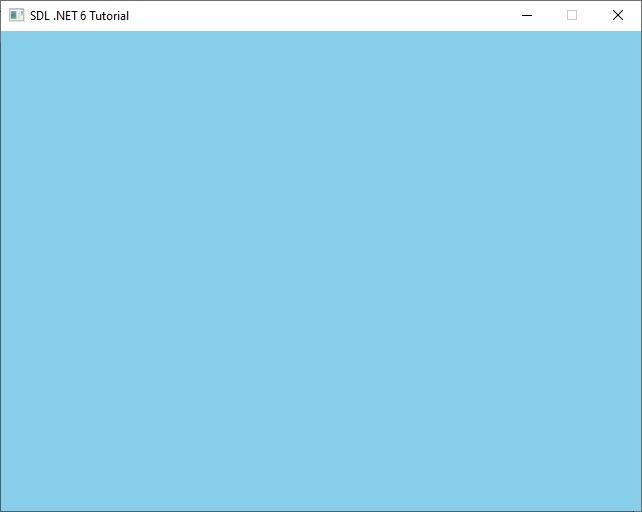
In our case we give it a RGB value of 135, 206, 235 which is a light blue, and an alpha value of 255 indicating no transparency. Next we need to clear the actual rendering surface using that color so that nothing from the last frame is left. We can do this with a call to SDL_RenderClear() which just takes a pointer to our renderer.
Finally we have the SDL_RenderPresent() function which once again just takes a pointer to our renderer. The SDL_RenderPresent() function takes the buffer we’ve been drawing to (in our case we’ve only cleared it with a blue color) and then presents it to the screen, swapping out the last frame. In the next tutorial we’ll be going over drawing shapes and all of our drawing code will happen between clearing the renderer and presenting.
Cleaning up SDL
/// <summary>
/// Clean up the resources that were created.
/// </summary>
void CleanUp()
{
    SDL.SDL_DestroyRenderer(renderer);
    SDL.SDL_DestroyWindow(window);
    SDL.SDL_Quit();
}
Before we can close our window and exit our program, we need to clean up the resources that SDL created for us. SDL_DestroyRenderer() and SDL_DestroyWindow() can be passed the appropriate pointers and will destroy those objects for us. Finally a call to SDL_Quit() will clean up all of the initialization that SDL did and allow us to safely exit.
In Closing
Now you’ve got a window up and running using C# and SDL!
There are for sure some improvements that could be made in order to further organize the code (such as creating a Game or Window class that contains our global variables as members), but I wanted to be able to present the functions of SDL and how to utilize them with the bindings, without overcomplicating the codes organization. Also as of C# 7.2, we can change the Using SDL2; at the top to:
using static SDL2.SDL;
This allows us to call all of the SDL bindings without the SDL. prefix. So SDL.SDL_Init() would be just SDL_Init(). When I initially wrote the code for this tutorial I hadn’t known about this new language feature and I didn’t want to create problems for people trying to use these tutorials for older versions of .NET.
In this tutorial we’ll be going through the setup process to get SDL working with C# and .NET 6, so that in later on tutorials we can use C# to develop a simple, portable, cross platform game.
Prerequisites
You’ll need the following installed or downloaded in order to progress through the tutorial. If you’re on Windows, you can simply use the Sayers.SDL2.Core NuGet package that we will be adding as a step in this tutorial. For other platforms you’ll need get the Development Libraries from the links below and download either the Development Libraries with a type of (Visual C++ 32/64-bit) or even just the Runtime Binaries for your system (32 bit vs 64bit) since we’ll just be using the output dlls from them.
Once you have all the above downloaded, start by running through the installers for Visual Studio followed by .NET6.0 if you don’t already have them installed.
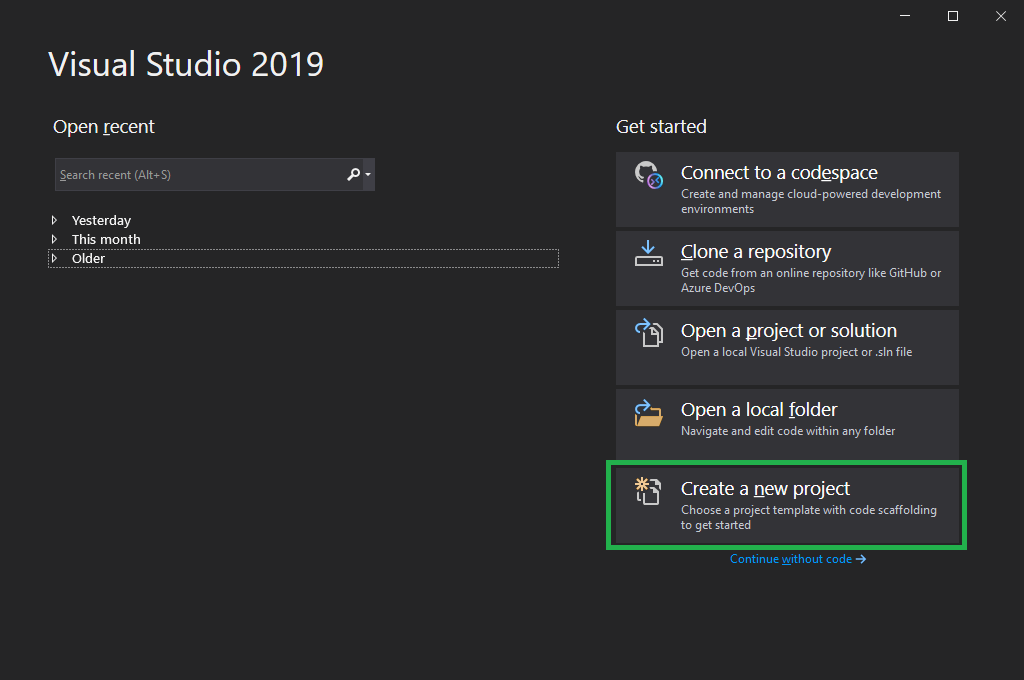
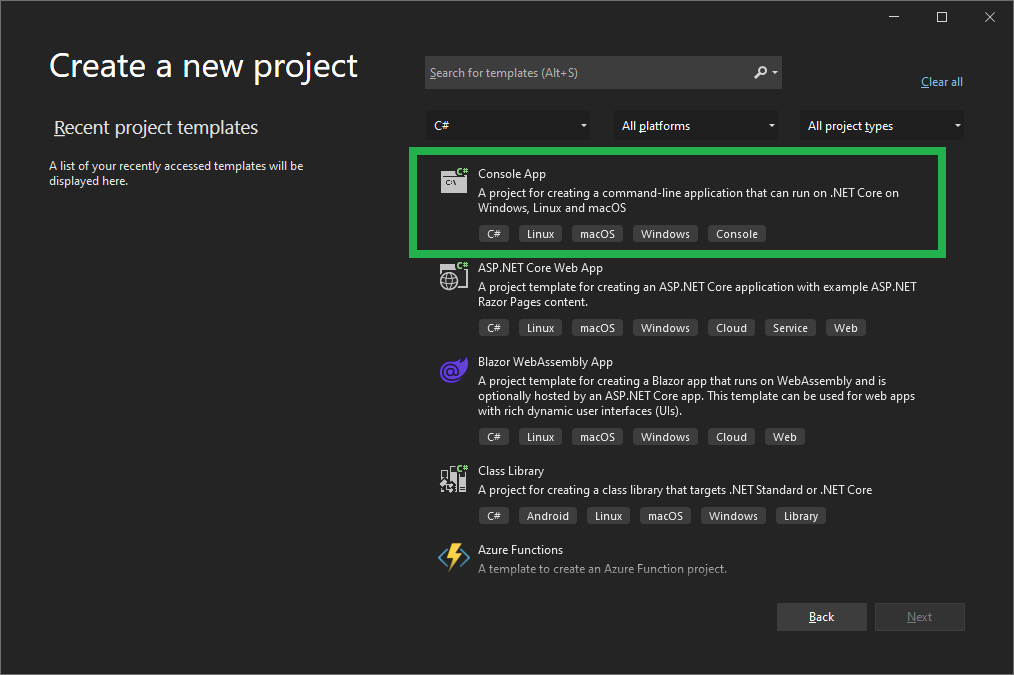
Next fire up Visual Studio and select Create a new project
On the following Create a new project screen, select the Console App template, making sure that it is the C# variant that specifically mentions .NET Core in the description.
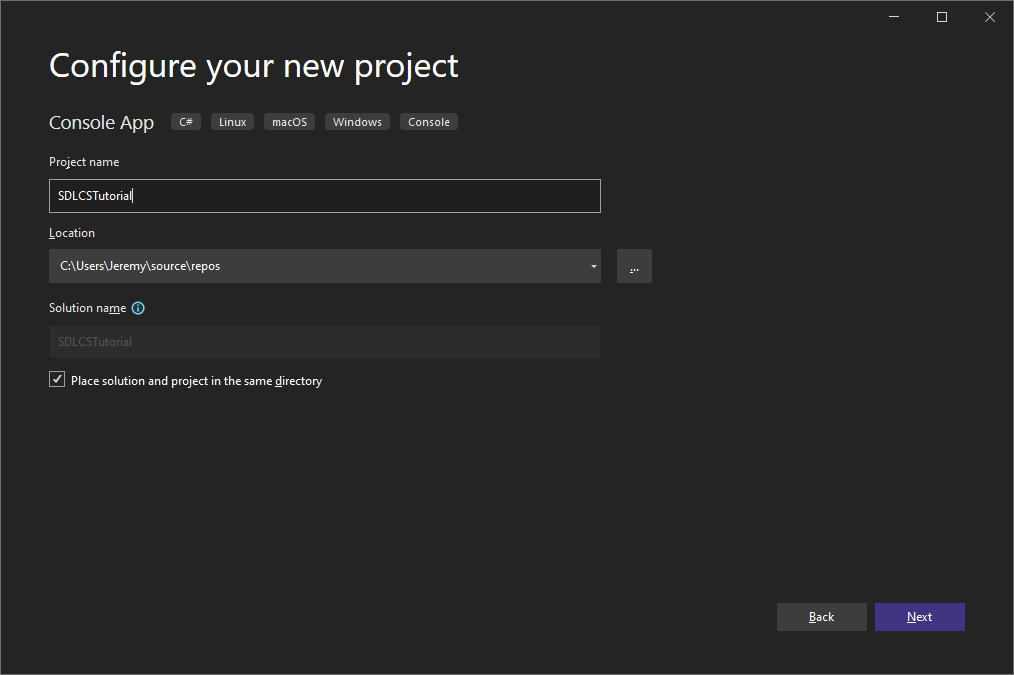
Give your project a name and select the location where you would like it to be stored and then select Create
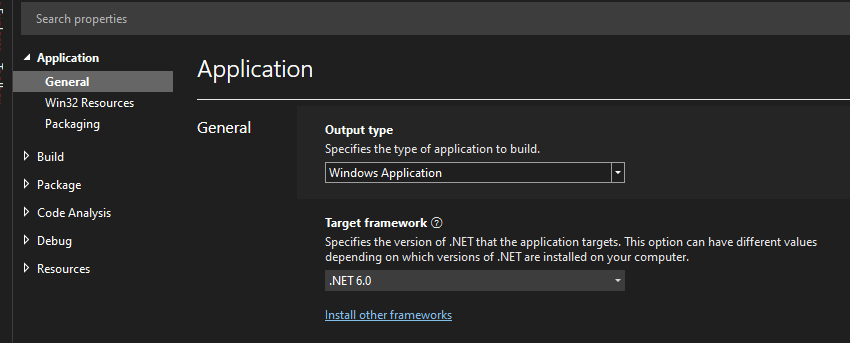
Once our project has been created, you’ll be greeted with the familiar blank canvas that is the C# Console Application template, but before we jump in we need to change a few things. The first of which is setting the the Target Framework to .NET 6.0 and setting the Output type to Windows Application. Both of these can be found by right clicking on your project, selecting Properties and then selecting the Application tab on the left. Save the changes with Ctrl + S.
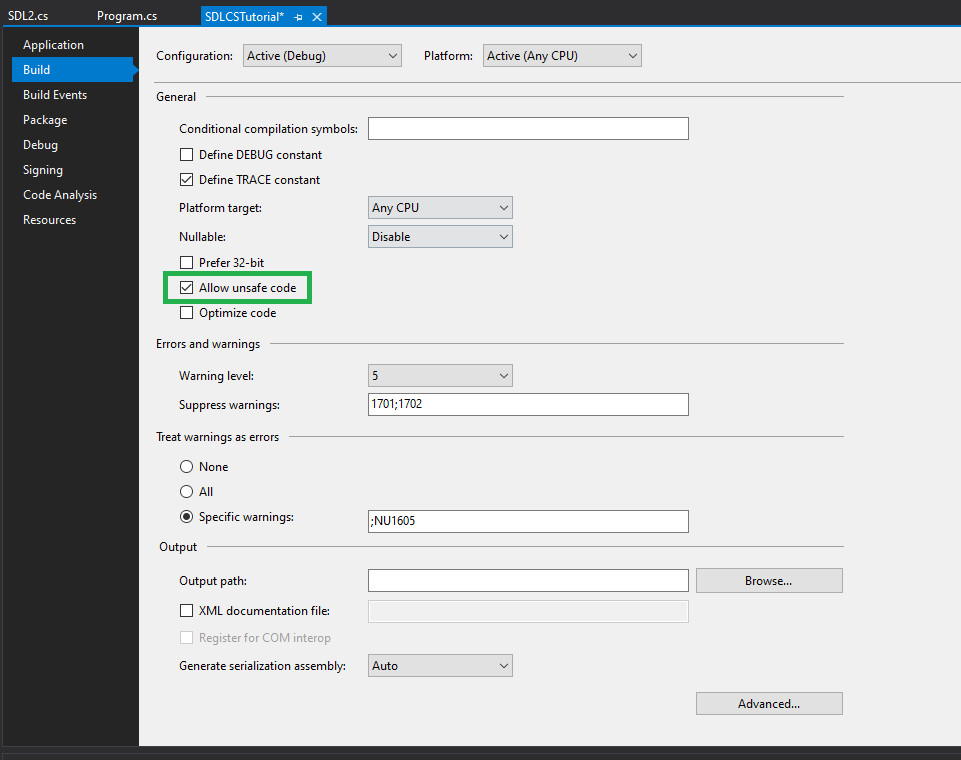
While you’re in the project properties you will also need to check Allow unsafe code so that we can utilize the SDL dlls:
SDL2 NuGet Setup (Windows x64 Only)
If you’re on x64 Windows then you’re in luck! In Visual Studio you can right click on your project and select Manage NuGet Packages
Then hit the Browse tab and search for Sayers.SDL2.Core. The current version is 1.0.11 and has the native DLLs for SDL version 2.0.20. Finally click Install and then OK on the Preview Changes window that pops up next.
With the NuGet package added you can skip both Setup the SDL DLLs and Getting the SDL2-CS Bindings in Place sections below and head straight toPutting it all Together!
Setup the SDL DLLs (Not Needed with NuGet Package)
In order for your project to work with the SDL libraries, we need to put the DLLs somewhere that your executable will find them. The easiest way is to place them in the output directory of your project, which is how you would “ship” your game. The downside to this is that if you Clean the solution, it will wipe out your output directly and you’ll have to re copy them over. For now we’ll show the easy way and I’ll put together a dedicated post on the different methods of dealing with this.
First build the solution so that we can generate our output folder structure. Start by going to Build and then Build Solution
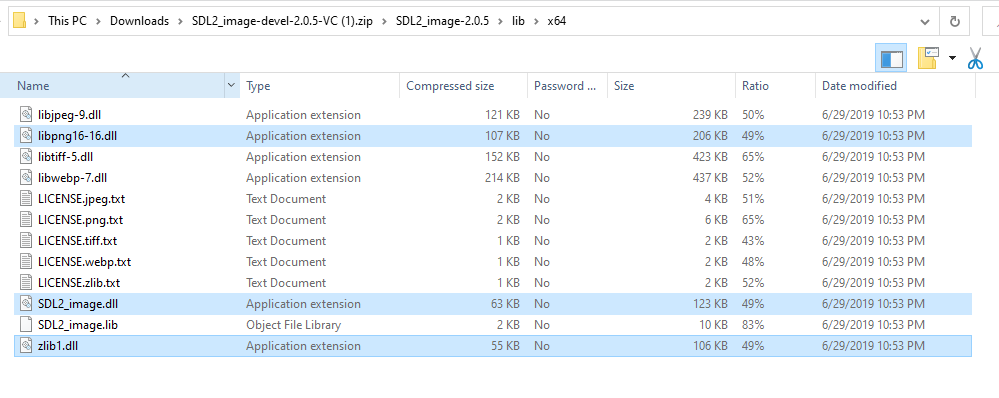
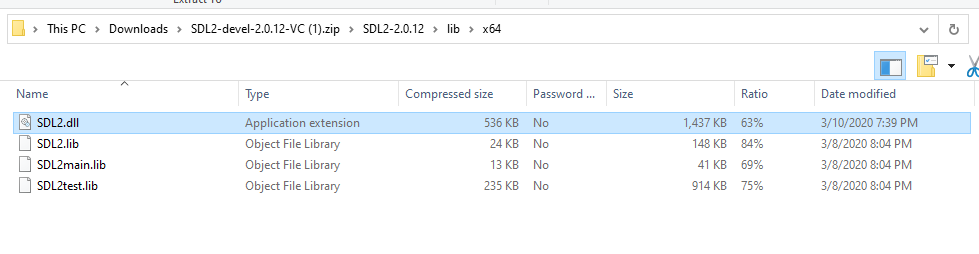
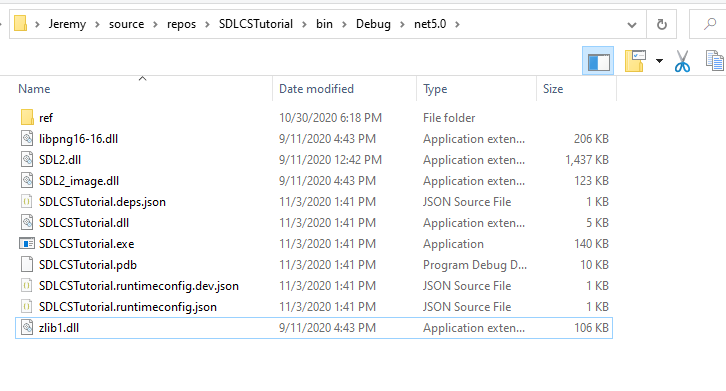
Now open up an instance of File Explorer and head to your project root and then traverse down to [Project Root] > bin > Debug > net6.0 and copy over these dlls from your SDL_image and SDL development library downloads: libpng16-16.dll, SDL2_image.dll, zlib1.dll, and SDL2.dll into your projects net5.0 folder.
The net6.0 folder of your project should now look similar to this, notice how your projects executable (in this case “SDLCSTutorial.exe”) and the copied dlls are all in the same folder.
Getting the SDL2-CS Bindings in Place (Not Needed with NuGet Package)
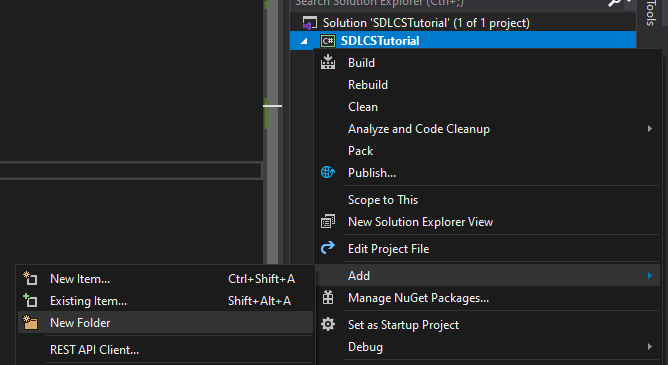
Now we need to get the SDL2-CS bindings in place and ready to use. Head back over to Visual Studio and right click on your project and select Add > New Folder and name it SDL2.
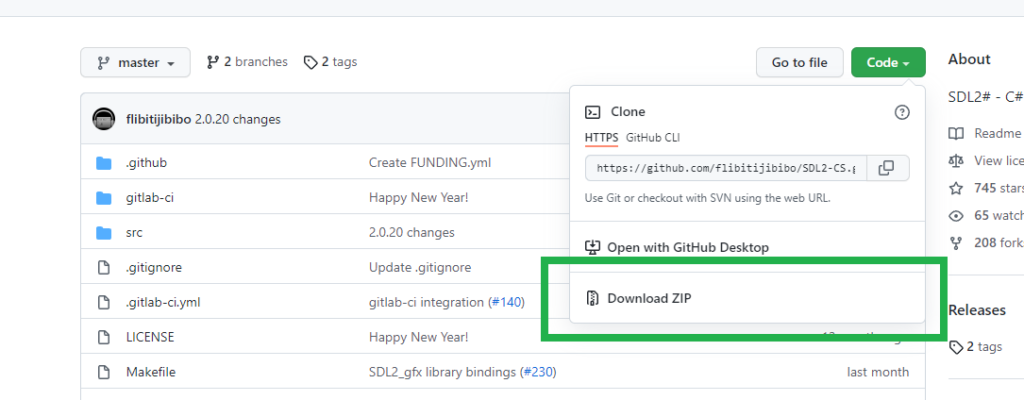
Next copy the 4 .cs files from the SDL2-CS repo (https://github.com/flibitijibibo/SDL2-CS) into the folder you’ve just created. Make sure you’re using the latest and not any of the out of date nuget packages, since they’re missing some bindings that I had added to the SDL2-CS project recently. The easiest way to download the 4 required .cs files is to go to the above repository link and then select Code > Download as Zip
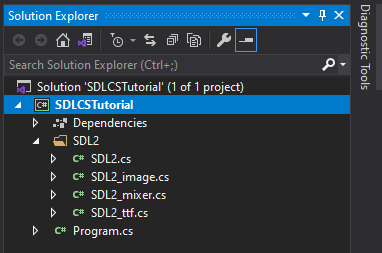
Once you’ve downloaded the zip of the repository and added the 4 files to your solution, it should look something like this the tree below. I’ve had a few people reach out to me about this step, and if you’re having any trouble, you can take a look at the source for the tutorial or even download it and work from it: https://github.com/JeremySayers/SDL2-CS-Tutorial. Keep in mind that you’ll still need to copy over the dlls into the output directory if you use the above source as a starting point.
Putting it all Together
Finally to make sure everything is setup correctly copy and paste the following as your Program.cs (making sure to have a using for SDL2). We won’t go over what each of these pieces of code do in this tutorial, as that’s the content for the next one, but this will ensure that everything is setup correctly and working.
using SDL2;
using System;

// Initilizes SDL.
if (SDL.SDL_Init(SDL.SDL_INIT_VIDEO) < 0)
{
    Console.WriteLine($"There was an issue initilizing SDL. {SDL.SDL_GetError()}");
}

// Create a new window given a title, size, and passes it a flag indicating it should be shown.
var window = SDL.SDL_CreateWindow("SDL .NET 6 Tutorial", SDL.SDL_WINDOWPOS_UNDEFINED, SDL.SDL_WINDOWPOS_UNDEFINED, 640, 480, SDL.SDL_WindowFlags.SDL_WINDOW_SHOWN);

if (window == IntPtr.Zero)
{
    Console.WriteLine($"There was an issue creating the window. {SDL.SDL_GetError()}");
}

// Creates a new SDL hardware renderer using the default graphics device with VSYNC enabled.
var renderer = SDL.SDL_CreateRenderer(window,
                                        -1,
                                        SDL.SDL_RendererFlags.SDL_RENDERER_ACCELERATED |
                                        SDL.SDL_RendererFlags.SDL_RENDERER_PRESENTVSYNC);

if (renderer == IntPtr.Zero)
{
    Console.WriteLine($"There was an issue creating the renderer. {SDL.SDL_GetError()}");
}

// Initilizes SDL_image for use with png files.
if (SDL_image.IMG_Init(SDL_image.IMG_InitFlags.IMG_INIT_PNG) == 0)
{
    Console.WriteLine($"There was an issue initilizing SDL2_Image {SDL_image.IMG_GetError()}");
}

var running = true;

// Main loop for the program
while (running)
{
    // Check to see if there are any events and continue to do so until the queue is empty.
    while (SDL.SDL_PollEvent(out SDL.SDL_Event e) == 1)
    {
        switch (e.type)
        {
            case SDL.SDL_EventType.SDL_QUIT:
                running = false;
                break;
        }
    }

    // Sets the color that the screen will be cleared with.
    if (SDL.SDL_SetRenderDrawColor(renderer, 135, 206, 235, 255) < 0)
    {
        Console.WriteLine($"There was an issue with setting the render draw color. {SDL.SDL_GetError()}");
    }

    // Clears the current render surface.
    if (SDL.SDL_RenderClear(renderer) < 0)
    {
        Console.WriteLine($"There was an issue with clearing the render surface. {SDL.SDL_GetError()}");
    }

    // Switches out the currently presented render surface with the one we just did work on.
    SDL.SDL_RenderPresent(renderer);
}

// Clean up the resources that were created.
SDL.SDL_DestroyRenderer(renderer);
SDL.SDL_DestroyWindow(window);
SDL.SDL_Quit();
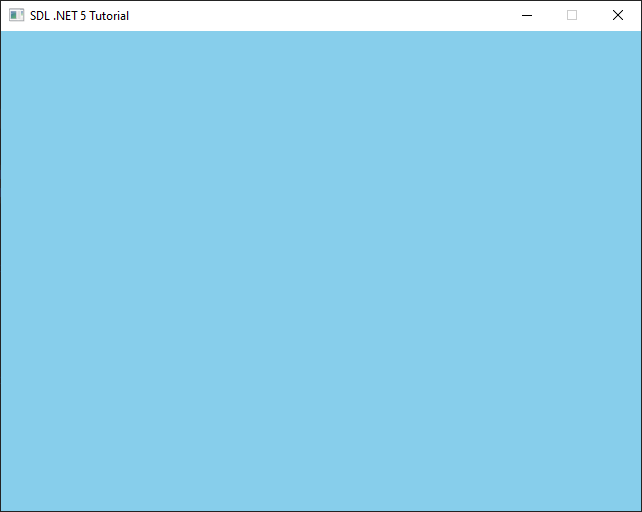
Now run your program and if you see this then congratulations you’re setup and ready to go! If you have any questions or issues feel free to leave a comment down below and Part 2 is live now here: Part 2 – Creating a Window.
Common Issues and Troubleshooting
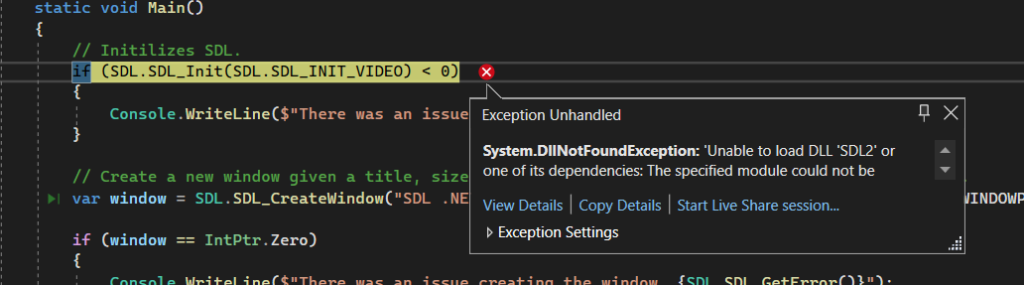
If you see a System.DllNotFoundException then one or more of the dlls required are not in your output folder. Head back up to the Setup the SDL DLLs section above and verify that you’ve copied them all.
Another common issue I’ve seen is an error of 'SDL_image' does not contain a definition for 'IMG_GetError'. This is caused by not having the latest SDL2-CS bindings (either using an out of date copy, or using the old abandoned nuget packages). Make sure you’ve downloaded the latest bindings and copied over their files.
I was beyond excited to discover that there was already an extension for Blazor to be able to interact with an HTML5 canvas called Blazor Extensions Canvas. So I spun up Visual Studio and created a new Blazor client project and begin to strip away all the bloat.
After getting rid of most of the bloat, my App.razor was now just:
You can find the full source code at my Github here, but I’ll show some pertinent bits below. The first being that in the javascript side I have a main game loop that calls back into the C# code using InvokeMethodAsync:
function gameLoop(timeStamp) {
    window.requestAnimationFrame(gameLoop);
    game.instance.invokeMethodAsync('GameLoop',
                                    timeStamp,
                                    game.canvas.width,
                                    game.canvas.height);
}
And then on the C# side I’ve got the GameLoop function as such with calls being made to populate the canvas:
[JSInvokable]
public async ValueTask GameLoop(float timeStamp, int width, int height)
{
...
    await _context.BeginBatchAsync();
    await context.SetFillStyleAsync("green");
    await context.FillRectAsync(x, y, 50, 50);
...
    await _context.EndBatchAsync();
}
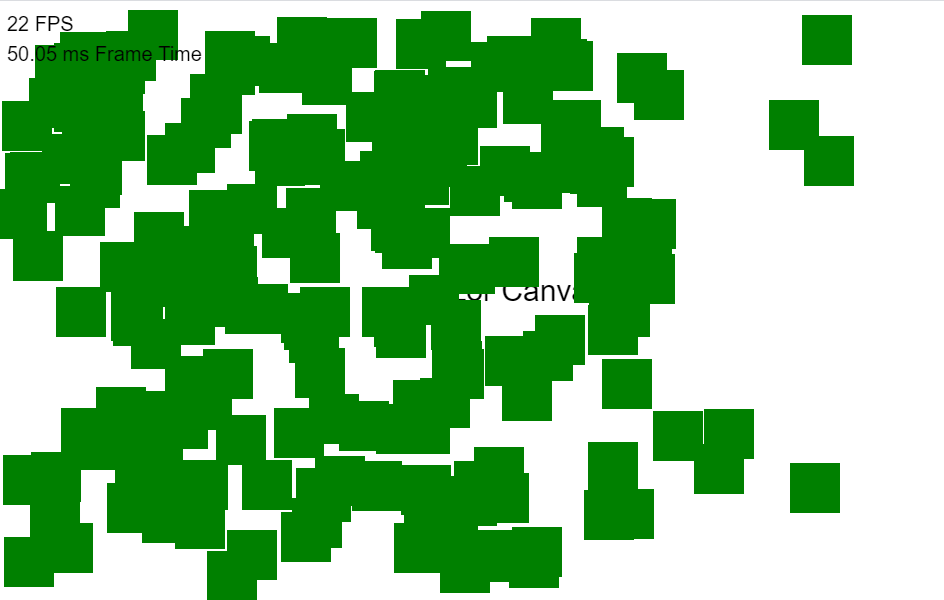
Pretty soon I had a rectangle bouncing around the screen and an FPS counter! It was chilling at a rock solid 60FPS and I thought this was going to be my new tool to develop games for games jams to be played in the browser. So next I bumped it up to 20 rectangles just to make sure everything was still smooth and I noticed the FPS dropping a bit sometimes, I chalked it up to being run in debug and kept going with structuring the code.
Soon though I remembered reading that this wasn’t great for performance and so I dropped down 200 rectangles and to my horror it was maxing out at 22 FPS on a machine with a 1080Ti.
After verifying that hardware acceleration in chrome was in fact enabled, and opening up a more “native” wasm project that I had worked on before that could handle 10s of thousand sprites at once, I learned that the JSInterop was killing this dream.
The back and fourth between JS and C# is just to big of an overhead right now, I might experiment with “rendering” all of the images onto a surface of sorts and only calling a canvas draw function once per frame, but for now Blazor does not seem like a great candidate for game development.