In this tutorial we’ll be going over getting a window created with C#, .NET 6, and SDL. If you haven’t gotten your environment setup yet, you’ll want to head on over to the Part 1 Setup here. Although the setup tutorial ends with displaying a window to verify everything is working, we’ll be organizing the code a little bit more this time around and going over each block. All of this code belongs in our Program.cs which is utilizing .NET 6 top level statements to clear away some boilerplate. The entire source for the tutorial can be found at https://github.com/JeremySayers/SDL2-CS-Tutorial.
using SDL2;
using System;
The first couple of lines are just to setup our usings with using SDL2 being used for interacting with our SDL2-CS bindings, and using System being used for writing out possible errors to the console.
IntPtr window;
IntPtr renderer;
bool running = true;
The next block of code sets up some global variables we’ll be using to interact with the window and renderer. Because SDL2 is c based, most of the objects that we’ll be initializing will be returned as a pointer, so in C# we’ll need to use the IntPtr struct for working with them.
Setup();

while (running)
{
    PollEvents();
    Render();
}

CleanUp();
The next block contains all of the functions we’ll be declaring and using throughout the rest of our Program.cs. Let’s go over them section by section.
Setup
/// <summary>
/// Setup all of the SDL resources we'll need to display a window.
/// </summary>
void Setup()
{
// Initilizes SDL.
if (SDL.SDL_Init(SDL.SDL_INIT_VIDEO) < 0)
{
Console.WriteLine($"There was an issue initializing SDL. {SDL.SDL_GetError()}");
}
// Create a new window given a title, size, and passes it a flag indicating it should be shown.
window = SDL.SDL_CreateWindow(
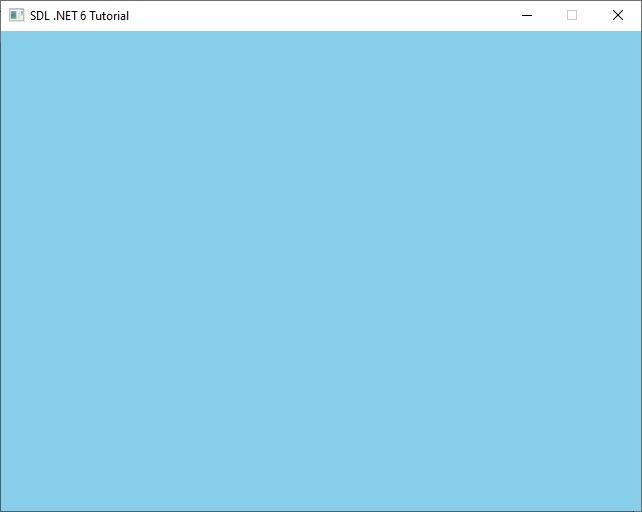
"SDL .NET 6 Tutorial",
SDL.SDL_WINDOWPOS_UNDEFINED,
SDL.SDL_WINDOWPOS_UNDEFINED,
640,
480,
SDL.SDL_WindowFlags.SDL_WINDOW_SHOWN);
if (window == IntPtr.Zero)
{
Console.WriteLine($"There was an issue creating the window. {SDL.SDL_GetError()}");
}
// Creates a new SDL hardware renderer using the default graphics device with VSYNC enabled.
renderer = SDL.SDL_CreateRenderer(
window,
-1,
SDL.SDL_RendererFlags.SDL_RENDERER_ACCELERATED |
SDL.SDL_RendererFlags.SDL_RENDERER_PRESENTVSYNC);
if (renderer == IntPtr.Zero)
{
Console.WriteLine($"There was an issue creating the renderer. {SDL.SDL_GetError()}");
}
}Our Setup function does most of the heavy lifting for getting SDL running. First up we have a call to SDL_Init() (Keep in mind that we need to prefix most of the calls to SDL with SDL since that’s the bindings static class name). This function sets up the passed in SDL sub system, in our case SDL_INIT_VIDEO, and gives us a return value of 0 on success or a negative number indicating there was an error. Most SDL functions and their documentation can be found on https://wiki.libsdl.org/ with the function in question being found here: https://wiki.libsdl.org/SDL_Init.
In the event that the call to SDL_Init() failed, we’ll want to print out what went wrong to the console using Console.WriteLine. SDL gives us a handy function SDL_GetError() that will contain the most recent reported error.
// Create a new window given a title, size, and passes it a flag indicating it should be shown.
window = SDL.SDL_CreateWindow(
    "SDL .NET 6 Tutorial",
    SDL.SDL_WINDOWPOS_UNDEFINED,
    SDL.SDL_WINDOWPOS_UNDEFINED,
    640,
    480,
    SDL.SDL_WindowFlags.SDL_WINDOW_SHOWN);

if (window == IntPtr.Zero)
{
    Console.WriteLine($"There was an issue creating the window. {SDL.SDL_GetError()}");
}
Next, we make a call to SDL_CreateWindow() which takes in the following arguments:
- Title – A string containing the title for the window to be displayed.
- X – The X position on the current display to place the window,
SDL.SDL_WINDOWPOS_UNDEFINEDcan be used to center it. - Y – The Y position on the current display to place the window,
SDL.SDL_WINDOWPOS_UNDEFINEDcan be used to center it. - Width – The width of the window in pixels.
- Height – The height of the window in pixels.
- Flags – Flags to set the window up with, some common ones are
SDL_WINDOW_SHOWNandSDL_WINDOW_FULLSCREEN.
We then check to make sure we get back a valid pointer to the window object that SDL created for us. By default, an IntPtr is set to IntPtr.Zero so if we still have that value, something went wrong and we can output the error to the console.
// Creates a new SDL hardware renderer using the default graphics device with VSYNC enabled.
renderer = SDL.SDL_CreateRenderer(
    window,
    -1,
    SDL.SDL_RendererFlags.SDL_RENDERER_ACCELERATED |
    SDL.SDL_RendererFlags.SDL_RENDERER_PRESENTVSYNC);

if (renderer == IntPtr.Zero)
{
    Console.WriteLine($"There was an issue creating the renderer. {SDL.SDL_GetError()}");
}
Now we need to setup the actual renderer that will be responsible for drawing our shapes, images, and textures to the screen. SDL2 comes with a capable hardware renderer that will easily let us create 2D games without needing to dig into OpenGL. To get started we’re going to make a call to SDL_CreateRenderer() which takes in the following arguments:
- Window- A pointer to the window the renderer will be displayed.
- Index – The index of the rendering driver to initialize, or -1 to initialize the first one supporting the requested flags.
- Flags- Flags used to initialize the renderer.
In our case we want the renderer to be hardware accelerated so we’re passing SDL_RENDERER_ACCELERATED. There is also a software renderer available if you don’t have a dedicated GPU or iGPU paired with your CPU via SDL_RENDERER_SOFTWARE. Then we’re or’ing (|) that flag with the SDL_RENDERER_PRESENTVSYNC flag, which tells the renderer to wait for the next vertical sync before displaying the buffer to the screen. This means that our Render function later on will only be called 60 times a second (or whatever the refresh rate of your monitor is.)
Just like the window pointer we got back from SDL, we’ll want to also make sure the renderer got created properly by making sure the pointer isn’t still set to IntPtr.Zero.
Polling Events
/// <summary>
/// Checks to see if there are any events to be processed.
/// </summary>
void PollEvents()
{
    // Check to see if there are any events and continue to do so until the queue is empty.
    while (SDL.SDL_PollEvent(out SDL.SDL_Event e) == 1)
    {
        switch (e.type)
        {
            case SDL.SDL_EventType.SDL_QUIT:
                running = false;
                break;
        }
    }
}
We’ll be going over events more in a later part to this tutorial series, but for now we need a way to actually exit our window. To do this, every frame we’ll be making a call to SDL_PollEvent in a while loop. Every time we do this, SDL will either give us back an event to be processed, or it will return 0 indicating that there are no new events since the last time we read them all. Next we can check the type of event in a switch statement, in our case we care about SDL_EventType.SDL_QUIT which is called when we either hit the Close button on our window’s title bar, or possibly through ALT-F4. When we get this event, we want to set our global running variable to false so our main loop will exit.
Rendering to the Window
/// <summary>
/// Renders to the window.
/// </summary>
void Render()
{
    // Sets the color that the screen will be cleared with.
    SDL.SDL_SetRenderDrawColor(renderer, 135, 206, 235, 255);

    // Clears the current render surface.
    SDL.SDL_RenderClear(renderer);

    // Switches out the currently presented render surface with the one we just did work on.
    SDL.SDL_RenderPresent(renderer);
}
The render function is where we’re going to be doing all of our drawing to the window. First we need to setup the draw color that SDL will use, this will be the color that any clearing of the screen or shapes we draw will use. We can set that color with SDL_SetRenderDrawColor() which takes the following arguments:
- Renderer – A pointer to the renderer that you want to set the draw color on.
- R – The red value used to draw on the rendering target.
- G – The green value used to draw on the rendering target.
- B – The blue value used to draw on the rendering target.
- A – The alpha value used to draw.
In our case we give it a RGB value of 135, 206, 235 which is a light blue, and an alpha value of 255 indicating no transparency. Next we need to clear the actual rendering surface using that color so that nothing from the last frame is left. We can do this with a call to SDL_RenderClear() which just takes a pointer to our renderer.
Finally we have the SDL_RenderPresent() function which once again just takes a pointer to our renderer. The SDL_RenderPresent() function takes the buffer we’ve been drawing to (in our case we’ve only cleared it with a blue color) and then presents it to the screen, swapping out the last frame. In the next tutorial we’ll be going over drawing shapes and all of our drawing code will happen between clearing the renderer and presenting.
Cleaning up SDL
/// <summary>
/// Clean up the resources that were created.
/// </summary>
void CleanUp()
{
    SDL.SDL_DestroyRenderer(renderer);
    SDL.SDL_DestroyWindow(window);
    SDL.SDL_Quit();
}
Before we can close our window and exit our program, we need to clean up the resources that SDL created for us. SDL_DestroyRenderer() and SDL_DestroyWindow() can be passed the appropriate pointers and will destroy those objects for us. Finally a call to SDL_Quit() will clean up all of the initialization that SDL did and allow us to safely exit.
In Closing
There are for sure some improvements that could be made in order to further organize the code (such as creating a Game or Window class that contains our global variables as members), but I wanted to be able to present the functions of SDL and how to utilize them with the bindings, without overcomplicating the codes organization. Also as of C# 7.2, we can change the Using SDL2; at the top to:
using static SDL2.SDL;This allows us to call all of the SDL bindings without the SDL. prefix. So SDL.SDL_Init() would be just SDL_Init(). When I initially wrote the code for this tutorial I hadn’t known about this new language feature and I didn’t want to create problems for people trying to use these tutorials for older versions of .NET.